


The Golden Rule of Food Safety

The 2026 4-Step Sandwich Safety Checklist
Step 1: The Storage Audit
-
Consistent Chill: Was your refrigerator at a steady 4°C (40°F) or below? Temperature fluctuations accelerate bacterial growth.
-
Proper Sealing: Was it wrapped tightly in cling film, sealed in a freezer sandwich bag, or stored in an airtight container? Proper sealing prevents drying and cross-contamination.
-
Immediate Discard: If the sandwich was left out at room temperature for over 2 hours or stored in a warm fridge, discard it immediately.
Step 2: The Sniff Test (Your First Line of Defense)
-
👁️ Visual Inspection: Look for mold—even specks. Check if lettuce is slimy, tomatoes are mushy, or deli meat looks discolored or dull.
-
👃 Aroma Check: Does it smell fresh? A sour, funky, or “off” odor is a clear sign of spoilage.
-
✋ Texture Test: Does the bread feel unusually sticky, slimy, or soggy? Any unexpected texture is a red flag.
Step 3: The Ingredient Investigation
Not all sandwiches are created equal. The fillings determine its shelf life. Use the table below to assess your sandwich’s risk level.
|
Sandwich Type
|
Key Risk Ingredients
|
Max Recommended Fridge Time
|
Key Considerations
|
|---|---|---|---|
|
Deli Meat Sandwich
|
Ham, turkey, salami
|
3 days
|
Risk of Listeria growth, even at cold temperatures.
|
|
Chicken/Tuna Salad
|
Meat, mayo, celery
|
3 days
|
A moist environment is ideal for bacteria.
|
|
Egg Salad Sandwich
|
Eggs, mayo
|
3 days
|
Similar risks to meat salads; risk of Salmonella.
|
|
Vegan Sandwich
|
Veggies, hummus, avocado
|
5-7 days
|
The primary risk is bread mold or sogginess.
|
|
PB&J Sandwich
|
Peanut butter, jelly
|
1+ week
|
Low moisture significantly slows bacterial growth.
|
Step 4: The Hygiene & Consumer Consideration
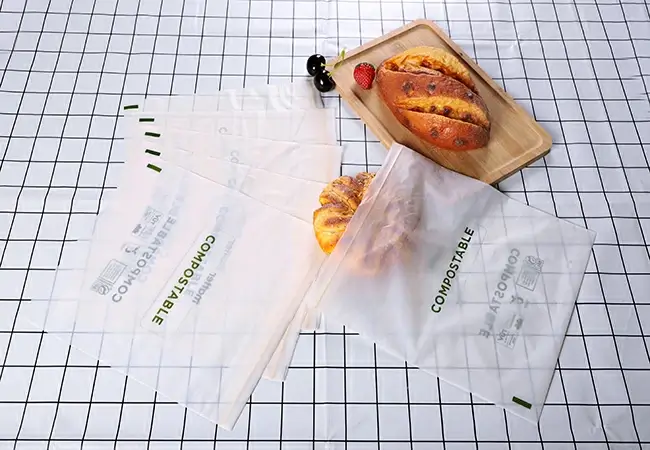
If you use reusable sandwich bags, ensure they’re thoroughly washed and dried between uses. For compostable sandwich bags, remember that they require industrial composting facilities to break down properly.
We need to be mindful of the chemicals we might ingest through our daily diet, which can come not only from the food itself but also from packaging containers like paper cups.
Deep Dive: The Invisible Threats – Listeria & Salmonella
-
Listeria: Known as the “fridge killer,” it can slowly multiply at 0-4°C.It poses a particularly high risk to fetuses, newborns, older adults, and individuals with compromised immune systems. Thorough reheating (to an internal temperature of 70°C/158°F for 5 minutes) can kill it.
-
Salmonella: Often introduced via contaminated eggs or unwashed vegetables. If a sandwich is contaminated during preparation, refrigeration won’t kill the bacteria, potentially causing illness upon consumption.
Safety Guide for Different Consumer Groups
-
Healthy Adults: A sandwich that passes all 4 checks can likely be consumed safely. For extra caution, reheat it in the microwave for 1-2 minutes on medium-high until the center is steaming hot (above 74°C/165°F).
-
For those with specific health considerations: Individuals whose immune systems may be more vulnerable (due to various life stages or health conditions) may wish to follow stricter guidelines. For maximum safety, consider consuming prepared sandwiches containing meat, eggs, seafood, or unpasteurized dairy within 2 days and ensuring they are thoroughly reheated, or opt for freshly made alternatives.
-
For Outdoor Activities (Picnics/Camping): Use an insulated cooler with sufficient ice packs to keep food at or below 4°C. Prepare perishable sandwiches within 2 hours before leaving. Avoid ingredients like lettuce, tomato slices, and mayo that spoil easily in the heat
Professional Storage & Reheating Tips
-
Best Storage Practice: Seal the sandwich tightly in a wrap or an airtight container and place it in the main body of the fridge (0-4°C) immediately after making. Most protein-based sandwiches are best consumed within 3 days.
- Reheating Methods:
-
Microwave (Most convenient): Remove wrapping, sprinkle a few drops of water on the bread to prevent toughness, and heat on medium-high for 1-2 minutes.
-
Skillet (Best texture): Use low heat with a little butter or oil, toast each side for 3-5 minutes until the interior is hot and the bread is crispy.
-
Oven/Air Fryer: Preheat to 180°C (350°F) and heat for 5-10 minutes.
-
Important Note: Reheating sandwiches with fresh vegetables can make them soggy. Consider adding veggies like lettuce after reheating.
-
Trends & Sustainable Choices (2026 Perspective)
-
Smart Packaging: Labels that indicate temperature abuse or microbial growth are becoming more accessible.
-
Zero-Waste Mindset: Using reusable silicone bags or truly industrially compostable packaging (like compostable sandwich bags) to reduce plastic pollution.
-
Home Food Safety Tech: Utilizing apps to log food storage times and set reminders to prevent forgetfulness.
Verdict: To Eat or Not to Eat?
FAQ About Sandwich Safety
A: It depends entirely on the conditions. If it was sealed and consistently refrigerated at 0-4°C, it’s usually safe. However, if it is left at room temperature (especially above 25°C/77°F) for more than 2 hours, bacteria can multiply rapidly, and it is not recommended for consumption.
A: There’s no one-size-fits-all answer; it depends on the ingredients. High-moisture, high-protein fillings (like egg or tuna salad) are best within 3 days. Low-moisture fillings (like peanut butter) last much longer. The general principle is: the sooner, the better. Most meat- or egg-based sandwiches should not be refrigerated for more than 3 days.
A: Use the “Look, Smell, Touch” rule: Look for mold, discoloration, or liquid seepage. Smell for sour, alcoholic, or off-putting odors. Touch the bread and fillings for any slimy or unusually sticky texture. Discard if any of these signs are present.
A: Yes. Sauces rich in oil and protein (like mayonnaise, salad dressing) are excellent media for bacterial growth if stored improperly. More acidic sauces (like ketchup, mustard) are less prone to spoilage.
A: Thorough reheating (to a core temperature of 74°C/165°F) can kill most common foodborne pathogens like Salmonella and E. coli. However, toxins produced by some bacteria (like Staphylococcus aureus) are heat-stable and will not be destroyed. Therefore, reheating is not a substitute for safe storage; a spoiled sandwich can still cause illness even after being heated.
A: The homemade process can introduce more risk points: cross-contamination between raw and ready-to-eat ingredients, unclean utensils, poor hand hygiene of the preparer, or the use of raw eggs in sauces. Commercially pre-packaged sandwiches are typically produced under stricter hygiene controls.
You May Also Be Interested In:
Sandwich Bag vs. Quart Bag: The Ultimate 2025 TSA Guide