


Can you really make ice cream in a ziplock bag? Yes — and it’s easier than you think! Forget fancy ice cream makers or complicated recipes. Just a small bag, a big bag, some ice and salt, and 10 minutes of shaking (seriously, that’s it!) – you can whip up rich, creamy homemade ice cream right at home.
Whether you’re prepping for a family camping trip, need a quick indoor activity for bored kids, or crave a sweet treat without leaving the couch, this ziplock bag method is your new go-to.
Ready to shake things up? Let’s dive in — and yes, we’ll answer the big question: Why do you need salt?
Why Do You Need Salt?
You’ve probably seen it in every recipe: “Add salt to the ice.” But why? Is it magic? Chemistry?
Actually, it’s science — and it’s what turns your milk and sugar into ice cream. When you add salt to ice, it lowers the freezing point of water. That means the ice melts at a colder temperature than 0°C (32°F). As the salt dissolves, it pulls heat from the surrounding mixture — in this case, your small bag of cream and sugar — rapidly cooling it down to the point where it freezes into ice cream.
Without salt, the ice would only get cold enough to chill the cream — not freeze it. That’s why this simple step is non-negotiable if you want that thick, scoopable texture. Think of it like a DIY freezer: the salt creates a super-cold environment that forces the liquid ingredients to solidify.
So next time you’re shaking that ziplock bag, remember — you’re not just mixing flavors. You’re conducting a mini science experiment that’s both delicious and educational.

Why Salt Makes It Work
Ice alone freezes at 32°F (0°C)—not cold enough to turn cream into ice cream.
Add salt, and the temperature drops to around 0°F (-18°C), pulling heat out of your mixture fast.
|
Salt Type
|
Effect
|
Recommendation
|
|---|---|---|
|
Table salt
|
Works, but slower
|
❌ Not ideal
|
|
Kosher salt
|
Fast, stable
|
✅ Good
|
|
Rock salt
|
Fastest, coldest
|
✅✅ Best choice
|
Pro Tip: Use coarse kosher salt or rock salt for faster results — they dissolve better and create a more consistent cold zone.
What You Need? Materials & Ingredients
This recipe is incredibly forgiving and adaptable. Whether you have a fully stocked kitchen or just the basics, you can make delicious ice cream. Here’s what you’ll need, broken down into two simple approaches.
The Essentials (for either method):
-
2 Ziplock bags: 1 small (pint-sized or 1-quart) and 1 large (gallon-sized or 2-gallon). Double-bagging is crucial to prevent leaks and ensure efficient shaking.
-
Ice: Enough to fill the large bag about halfway. A standard tray is plenty.
-
Salt: Coarse salt, like kosher salt or rock salt, works best. Table salt is fine in a pinch, but coarse salt dissolves more slowly, creating a longer-lasting cold environment. You’ll need about ½ to ¾ cup.
Option A: The Standard, Creamy Version
-
½ cup heavy cream or heavy whipping cream
-
1 cup half-and-half
-
2 tablespoons granulated sugar (adjust to taste)
-
½ teaspoon pure vanilla extract
Option B: The Easy, Lighter Version (No Heavy Cream Needed)
-
1 ½ cups whole milk (for best results) or 2% milk
-
3 tablespoons granulated sugar
-
1 teaspoon pure vanilla extract
Customize It!
-
Flavorings: Swap vanilla for other extracts (peppermint, almond, coconut).
-
Mix-ins: Chocolate syrup, fruit puree, or instant coffee granules can be added to the liquid mixture before shaking.
-
Toppings: Crushed cookies, sprinkles, chopped candy, or fresh fruit to fold in or sprinkle on top after.

Step-by-Step: How to Make Ice Cream in a Ziplock Bag
Follow these simple steps, and you’ll have ice cream in about 10 minutes. It’s a fun, hands-on process—perfect for kids to help with (just make sure the bags are sealed tight!).
1. Mix Your Ice Cream Base
-
Take the small ziplock bag.
-
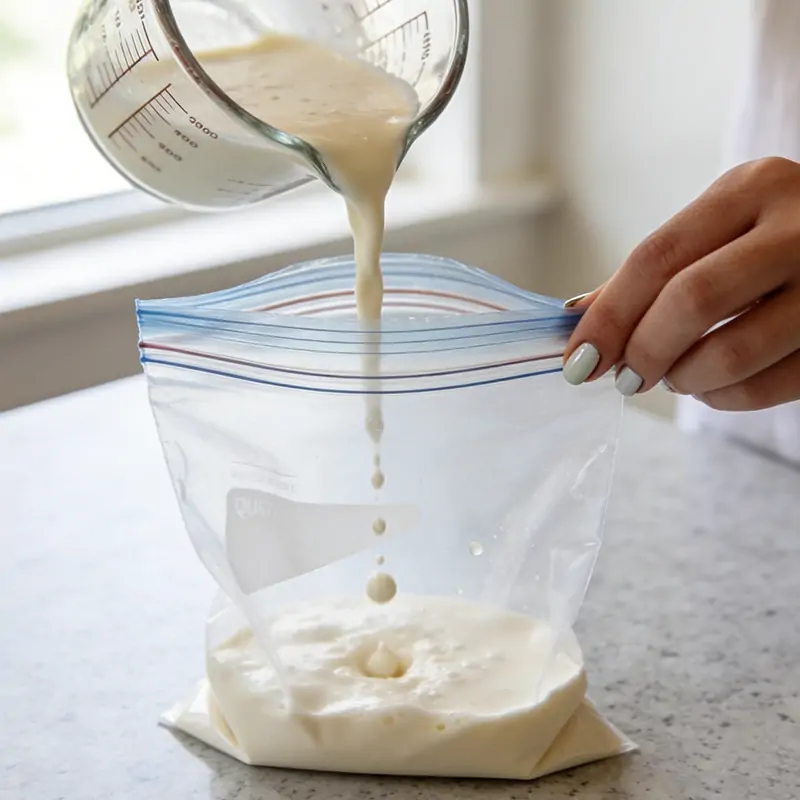
Pour in your chosen liquid ingredients (from Option A or B above), sugar, and vanilla extract.
-
Seal the bag tightly, pressing out as much air as possible. This helps the mixture freeze evenly and prevents the bag from popping open.
2. Prepare the “Freezer” Bag
-
Take the large ziplock bag and fill it about halfway with ice.
-
Sprinkle the coarse salt generously over the ice. Use about ½ cup. (Remember the science: the salt is what makes the ice cold enough to freeze the cream).
-
Place the sealed small bag with the ice cream mixture into the large bag, on top of the ice.
3. Shake, Shake, Shake!
-
Seal the large bag tightly, again removing excess air.
-
Now, the fun part: shake the bag vigorously! You can wrap it in a small towel or wear oven mitts if your hands get too cold.
-
Shake for 5 to 10 minutes. The mixture will thicken from a liquid to a soft-serve consistency. You’ll feel the small bag’s contents solidify.
4. Serve & Enjoy
-
Carefully remove the small bag from the large bag. Give the outside a quick rinse to wash off any salty ice melt.
-
Open the small bag, scoop your homemade ice cream into a bowl, and add your favorite toppings.
-
For a firmer texture, you can place the small bag (or transfer the ice cream to a container) in the freezer for 15-30 minutes before serving.
No Heavy Cream? No Problem! (The Ultimate Guide to Substitutes)
This is one of the most common questions: Can you make ice cream in a bag without heavy cream? Absolutely. While heavy cream and half-and-half yield the creamiest result, you have several fantastic, accessible alternatives. Here’s your quick guide to dairy and non-dairy swaps.
1. The All-Milk Method (Easy & Accessible)
-
The Ratio: Use 1 ½ cups of whole milk (for optimal richness), 3 tablespoons of sugar, and 1 teaspoon of vanilla extract.
-
The Result: A lighter, more ice-milk style treat. It’s refreshing and still delicious. For a slightly creamier texture with milk, add 1-2 tbsp of instant vanilla pudding mix to the base before shaking—it acts as a stabilizer.
2. The Evaporated Milk Trick (Rich & Creamy)
-
The Ratio: Substitute the heavy cream with an equal amount of evaporated milk. It’s shelf-stable, rich, and creates a wonderfully smooth texture because much of the water has been removed.
-
The Result: Surprisingly close to the “standard” version in creaminess.
3. Dairy-Free & Vegan Options
-
Full-Fat Coconut Milk: Use one 13.5oz can of full-fat coconut milk (chilled), 3-4 tbsp of maple syrup or sugar, and 1 tsp vanilla. Shake as usual. This makes a fantastically rich, scoopable vegan ice cream.
-
Unsweetened Almond Milk or Oat Milk: For a lighter option, use 1 ½ cups of your preferred unsweetened non-dairy milk, 3-4 tbsp of sweetener, 1 tsp vanilla, and 1 tbsp of cornstarch or 2 tbsp of nut butter (like almond butter). The thickener is key to achieving a creamy consistency instead of an ice block.
Pro Tips, Flavor Hacks & Troubleshooting
Master your ziplock bag ice cream with these expert tips, fun variations, and solutions to common issues.
Flavor Variations (Get Creative!)
-
Chocolate: Add 2 tbsp of cocoa powder or chocolate syrup to the base mixture before shaking.
-
Strawberry: Blend ¼ cup of fresh or frozen strawberries into a puree and mix it in.
-
Cookies & Cream: After shaking, fold in 2-3 crushed Oreo cookies.
-
Mint Chip: Use ¼ tsp peppermint extract instead of vanilla, and fold in mini chocolate chips after shaking.
-
Coffee: Dissolve 1 tsp of instant espresso powder into the milk/cream before adding other ingredients.
Topping & Mix-in Ideas
-
Classic: Sprinkles, chocolate sauce, caramel, whipped cream.
-
Crunchy: Crushed waffle cones, toffee bits, chopped nuts (peanuts, almonds).
-
Fruity: Fresh berry compote, sliced bananas, mango chunks.
-
Candy: Chopped Reese’s, M&M’s, gummy bears (add after shaking).
Success Secrets & Troubleshooting
-
Double-Bag for Safety: For extra leak protection, place your small bag of mixture inside another small bag before putting it in the ice bag.
-
Keep Hands Warm/Cold: Shake with oven mitts or wrap the large bag in a small towel. It keeps your hands from freezing and provides a better grip.
-
Shake Consistently: Don’t just toss it around. Vigorous, continuous shaking for 5-10 minutes is key to introducing air and preventing large ice crystals.
-
My ice cream is too soft/runny: You likely didn’t shake it long enough, or the salt-to-ice ratio was off. Seal it back up and shake for another 3-5 minutes. Ensure you used enough coarse salt (about ½ cup).
-
My ice cream is too hard/icy: This usually means it was over-shaken or the base had too high a water content (like using skim milk). For next time, use a base with more fat (cream, coconut milk) or a thickener. You can also let it sit at room temperature for a few minutes to soften before scooping.
-
The bag leaked! Always press out excess air before sealing, and check that the zipper is fully closed. The double-bag method is your best friend.
Safety Tips
-
Double-bag everything.
-
Don’t overfill the bags.
-
Use a towel or gloves while shaking.
-
Supervise young kids during the activity.
Conclusion: Your Homemade Adventure Awaits
And there you have it—the complete guide to making real, delicious ice cream with nothing more than a ziplock bag and a sense of adventure. This isn’t just a recipe; it’s a fun science project, a perfect rainy-day activity for kids, a clever camping hack, and a testament to how simple ingredients can create something magical.
Forget the store runs and the expensive machines. In about 10 minutes of playful shaking, you can unlock a world of creamy, customizable frozen treats. The best part? You’re in complete control—make it vanilla, chocolate, strawberry, or your own wild creation.
So, what are you waiting for? Grab those bags, raid your pantry, and start shaking. We can’t wait to hear about your creations.