


Keepsake
You just received a stunning bouquet. Maybe it’s from a birthday, an anniversary, or a wedding day. The flowers are wrapped in a beautiful sleeve, still dewy, still perfect. And then the question hits you: How do I make this last?
Do you want it to stay fresh for another week or two? Or do you want to turn it into a forever keepsake—something you can look at years later and still feel that moment?
The good news: both paths are possible. In this guide, we’ll walk you through the critical first steps right after you open the wrapping, then show you five proven methods to preserve your bouquet permanently. Whether you’re a bride saving her bridal bouquet or someone who simply hates seeing flowers die, you’ll find the right answer here.

Before You Preserve: The Critical First 48 Hours
Most people skip this part, and that’s exactly why their flowers fade before they even decide what to do. The moment your bouquet arrives, a clock starts ticking. Here’s what to do in the first 48 hours to maximize freshness—and leave all options open.
1. Check the Wrapping
-
If your bouquet came in a sealed plastic sleeve → unwrap it immediately — trapped moisture causes rot.
-
If it arrived in a breathable flower sleeve (perforated or with ventilation holes) → you have a little more time, but still better to remove within an hour or two.
Many florists now use breathable sleeves designed to let flowers breathe while staying hydrated. That small detail buys you precious time.
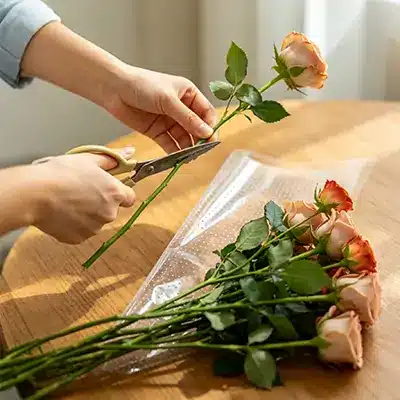
2. Re-Cut Stems at 45°
Take a sharp knife or scissors. Cut about 1 inch off each stem at a 45-degree angle. Why? A slanted cut exposes more surface area for water absorption. Also, remove any leaves that will sit below the water line—they rot quickly and breed bacteria.
3. Use Flower Food (or Make Your Own)
Most bouquets come with a tiny packet of flower food. Don’t toss it! It contains sugar (food), citric acid (lowers pH to help water uptake), and bleach (kills bacteria). Mix according to instructions.
No packet? DIY recipe: 1 teaspoon sugar + 1 teaspoon lemon juice + 1 drop of bleach per quart of lukewarm water.
4. The Overnight Refrigeration Trick
This is a game-changer, especially for wedding bouquets that need to survive until the ceremony the next day.
Place the entire bouquet (without any wrapping) in your refrigerator—not the freezer. Set temperature between 4–7°C (39–45°F). The cold slows respiration, reduces water loss, and can extend vase life by 3–5 days.
⚠️ Keep flowers away from fruits like apples and bananas—they release ethylene gas that speeds up aging.
5. When to Decide: Fresh or Forever?
-
If stems are firm, petals bright, no browning → you can continue fresh care for up to 2–3 weeks.
-
If you see drooping, brown edges, or petal drop → it’s time to move toward permanent preservation (drying, pressing, etc.).
Don’t wait too long. The earlier you start preservation, the better the result.
Route A – Keeping It Fresh for Weeks
-
Change water every 2 days (warm water works best).
-
Keep away from direct sun, heat vents, and fruit bowls (ethylene gas from apples/bananas kills flowers).
-
Recut stems every 3 days.
- Remove spent flowers promptly (they release ethylene).
-
Mist petals lightly if the air is dry.
With these simple steps, most mixed bouquets can stay fresh for 10–14 days, sometimes up to 3 weeks for hardy varieties like chrysanthemums or carnations.
But if you’re ready to turn that bouquet into a lasting memory, read on.
Route B – Permanent Preservation: 5 Methods Compared
Now we get to the heart of the matter. These five methods range from zero-cost DIY to professional-grade techniques. Each has its own strengths, so choose based on your goal, budget, and patience.
Method 1: Air‑Drying (Easiest, Best for Rustic Look)
-
Strip off excess leaves.
-
Gather stems into small bunches (4–6 stems each) and tie with a string or a rubber band.
-
Hang upside down in a dark, dry, well-ventilated area (closet, attic, or garage).
-
Wait 2–4 weeks until stems snap when bent.
Result: Beautiful vintage charm, muted colours, delicate texture.
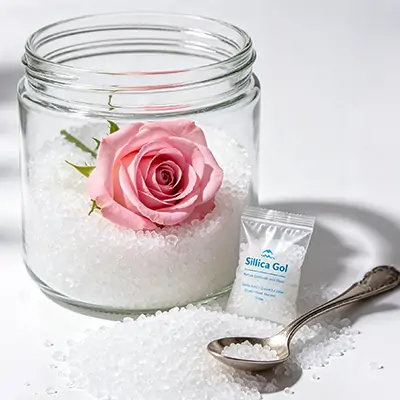
Method 2: Silica Gel (Best Color Retention)
Silica gel is a desiccant that pulls moisture from flowers much faster than air-drying, while preserving far more color and shape. It’s the gold standard for home preservation.
-
Pour a 1-inch layer of silica gel into the container.
-
Trim stems short (leave about 1 inch). Insert the flower head-down into the gel, gently spooning more gel around and between petals.
-
Seal the container tightly. Leave for 3–7 days, depending on flower thickness (roses take about 5 days; delicate flowers like daisies may only need 3).
-
Carefully pour out the gel and brush off residue.

Method 3: Pressing (Flat Keepsakes, Great for Framing)
-
Place flowers between two sheets of absorbent paper (parchment, coffee filter, or blotting paper).
-
Sandwich inside a heavy book or under a stack of books.
-
Add weight (more books, bricks, etc.).
-
Wait 1–3 weeks.
Method 4: Microwave Drying (Fastest, but Tricky)
-
Cover flowers completely with silica gel in a microwave-safe dish.
-
Microwave in short bursts (30 seconds to 1 minute), depending on flower size.
-
Let rest for 10 minutes after each burst to allow moisture to redistribute.
-
Repeat until flowers feel papery-dry.
Method 5: Resin / Freeze-Dry / Wax (Professional Touch)
These are advanced methods that yield museum-quality results but require more investment.
Epoxy Resin: Encapsulate dried flowers in clear resin to create paperweights, coasters, jewelry, or keychains. The learning curve is moderate—you need proper mixing ratios, degassing, and curing time. Kits start around $30.
Freeze-Drying: This commercial process removes moisture by sublimation (ice to vapor) under vacuum. Colors and shapes are nearly identical to fresh flowers. However, you’ll need to send your bouquet to a specialist service ($100–300 per bouquet). Many wedding preservation companies offer this.
Paraffin Wax Dipping: Melt paraffin wax and dip individual flowers briefly. They become stiff, slightly translucent, and last for years. Best for pinecones, wheat stalks, or dried grasses rather than delicate petals.
Which Method Should You Choose?
|
Method
|
Difficulty
|
Time
|
Cost
|
Colour Retention
|
|---|---|---|---|---|
|
Air‑dry
|
★☆☆☆☆
|
2–4 weeks
|
$0
|
★★☆☆☆
|
|
Silica gel
|
★★☆☆☆
|
3–7 days
|
$15–20
|
★★★★☆
|
|
Press
|
★☆☆☆☆
|
1–3 weeks
|
10
|
★★★☆☆
|
|
Microwave
|
★★★☆☆
|
Minutes
|
$15–30
|
★★★☆☆
|
|
Resin/Freeze
|
★★★★☆
|
Varies
|
$30–300
|
★★★★★
|
Display Your Preserved Bouquet Like a Pro
-
Shadow box frames are perfect for pressed flowers. Arrange them in a pleasing layout, add a photo or the original card, and hang them on the wall.
-
Glass cloches give air-dried bouquets a vintage, elegant look. Place a single dried rose under a bell jar for a minimalist statement.
-
Frame the whole memory: Include a snippet of the wrapping paper, a ribbon, or even the tag from the bouquet. Some people love to display the preserved flowers next to the original gift bag as a complete set—it tells the whole story.
Conclusion
You May Also Be Interested In:
The 3-5-8 Rule for Stunning Bouquets: Design Like a Pro (With Golden Ratio Tips)