


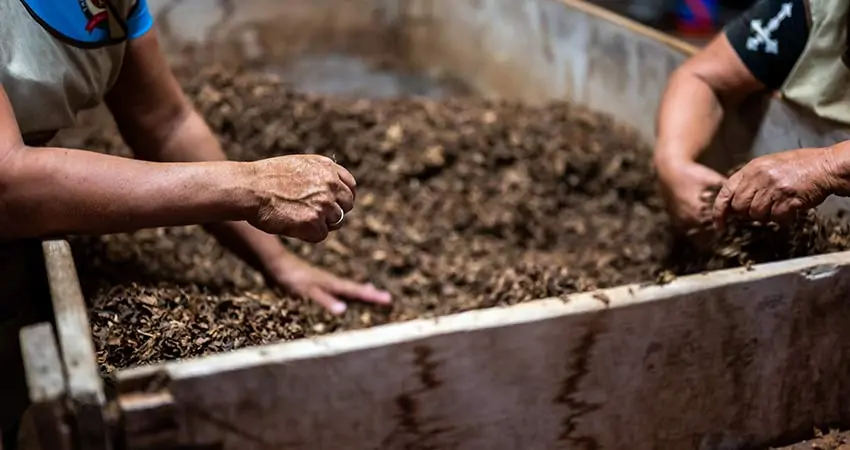
Composting as a Managed Ecosystem.
For many, the journey into composting begins with a desire to reduce waste and nurture their garden, but it often leads to a common frustration: a smelly, slimy, or pest-ridden bin. The disconnect lies in viewing compost as a pile of waste rather than a managed ecosystem.
This guide is designed for the discerning individual who seeks a methodical, science-backed approach. We will demystify the process into actionable principles and advanced techniques, transforming you from a novice into a confident composting practitioner. We will also explore how modern tools, such as certified compostable bags, integrate into a professional composting routine to enhance convenience and success.
Part 1: The Fundamental Science: Carbon, Nitrogen, and Microbial Life
The entire process of composting hinges on the activity of microorganisms—bacteria, fungi, and actinomycetes. Your role is not to decompose the waste yourself, but to be a master ecosystem manager, providing these microscopic workers with the ideal environment to thrive.
The Science: Microbes consume carbon for energy and nitrogen for protein synthesis. The optimal ratio for efficient decomposition is between 25:1 and 30:1 (carbon to nitrogen). The Practical Translation: You don’t need to calculate ratios. Remember this simple visual guideline: for every unit of nitrogen-rich “Greens,” you should add 2 to 3 units of carbon-rich “Browns.” Greens are typically moist and colorful; Browns are dry and woody.
Why does this matter?
Too much nitrogen (Low C/N ratio): Results in a soggy, anaerobic pile that smells like ammonia or rotten eggs. Too much carbon (High C/N ratio): Slows decomposition to a crawl, as microbes lack the nitrogen needed to multiply and work efficiently.
Mastering this balance is 90% of the battle won.
Part 2: The Input Matrix: A Detailed Guide to Compostable Materials
A professional approach requires precision in inputs. Below is a comprehensive matrix to guide your decisions. Notice the inclusion of a “Pro Tip” column, where we introduce advanced practices.
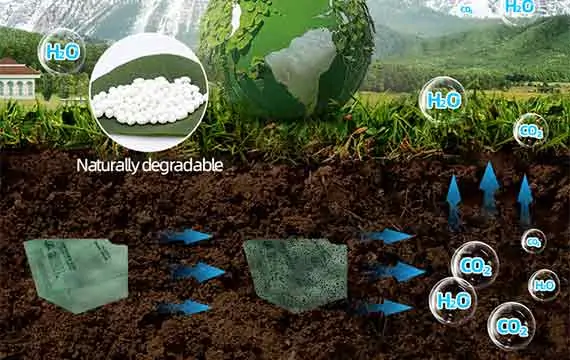
A Critical Note on Certification: Not all “biodegradable” or “compostable” claims are equal. When using compostable bags, ensure they are certified to recognized standards like OK compost HOME or ASTM D6400. This guarantees the bag will break down efficiently in a home composting system alongside your organic waste, leaving no harmful residues. This is a key marker of a professional-grade product.
Part 3: System Selection: Aligning Methodology with Your Space
Your environment dictates the best system. Here’s an objective analysis of the most effective methods.
The Compost Pile or Bin (The Classic Method) Best for: Gardeners with ample outdoor space. Pros: High capacity, cost-effective, promotes excellent aeration if turned regularly. Cons: Requires physical turning, can be slower in cool weather. Pro Integration: In a large pile, you can toss in the entire contents of your compostable bag. The bag helps keep the initial moisture of the kitchen scraps contained until the Browns can absorb it.
The Tumbling Composter (The Efficient Engine) Best for: Those seeking faster results with less physical effort. Pros: Easy turning, contained design deters pests, and can generate heat quickly. Cons: Limited capacity, can become too wet if not properly balanced. Pro Integration: The enclosed nature of tumblers makes moisture management critical. Using compostable bags for kitchen scraps prevents adding a surge of free water, helping to maintain the ideal “wrung-out sponge” consistency.
Bokashi Fermentation (The Indoor Pre-Treatment) Best for: Apartments, small spaces, or those wishing to compost ALL food waste (including small amounts of meat/dairy). Pros: Anaerobic process done in a sealed bucket, swift (2 weeks), no odor when closed. Cons: Produces a “pre-compost” that needs to be buried in soil or added to a traditional compost pile to finish. Pro Integration: While Bokashi utilizes a specific bran inoculant, the use of compostable bags for initial food collection remains applicable for superior kitchen hygiene.
Part 4: The Operational Protocol: A Step-by-Step Startup Guide
Follow these steps for a flawless initiation of a standard compost bin.
Site Selection: Choose a level, well-drained spot with partial shade. Full sun can dry out the pile; full shade can keep it too wet. Create a Base Layer: Start with a 4-6 inch layer of coarse browns (e.g., small twigs). This is critical for aeration and drainage at the bottom of the pile. The Layering Technique: Add a 2-3 inch layer of Greens (your kitchen scraps). Immediately cover it with a 4-6 inch layer of Browns. This “lasagna” method is the most effective way to maintain balance from the start. Moisture Management: After a few layers, check moisture. Squeeze a handful. It should feel like a wrung-out sponge, yielding only a drop or two of water. Adjust by adding water (if dry) or Browns (if wet). Aeration Schedule: For fastest results, turn the entire pile with a fork every 1-2 weeks. This introduces oxygen, redistributes moisture, and moves undecomposed material to the hot center.
Part 5: Advanced Troubleshooting: Diagnosing and Correcting Common Issues
Even well-managed systems can have hiccups. Use this diagnostic chart.
Problem: The Pile Smells Foul (Rotten Eggs or Ammonia) Diagnosis: Anaerobic conditions. Caused by excess moisture, insufficient aeration, or too many Greens. Solution: Turn the pile immediately to incorporate oxygen. Mix in a generous amount of dry, coarse Browns (shredded cardboard is excellent) to absorb moisture and create air channels.
Problem: Attracting Flies and Pests Diagnosis: Food scraps are exposed and accessible. Solution: This is a layering failure. Always cover new kitchen scraps with a thick layer (a “blanket”) of Browns. Using a compostable bag helps contain scraps during collection, but the final cover of Browns in the bin is non-negotiable for pest control.
Problem: The Pile is Not Heating Up Diagnosis: Pile is too small, too dry, or lacks nitrogen. Solution: Ensure the pile is at least 3’x3’x3′ to retain heat. If dry, moisten while turning. If mostly Browns, add a layer of Greens (like grass clippings or coffee grounds) to kickstart microbial activity.
Problem: The Compost is Finished, But There Are Bag Fragments Diagnosis: The compostable bags used were not certified for home composting, or the compost cycle was too short/cold. Solution: Always use certified home compostable bags. Even with certified bags, if your pile doesn’t maintain adequate heat and moisture, breakdown will be slower. Sift out the unfinished fragments and add them back to your new pile to continue decomposing.
Part 6: Harvesting Your Black Gold: Signs of Success and Application
Signs of Mature Compost: The material will be dark brown, crumbly, and have a pleasant, earthy smell. Original materials should be unrecognizable. Curing: For best results, let the finished compost “cure” for an additional 2-4 weeks. This stabilizes the nutrients and ensures the decomposition process is complete. Application: Use your nutrient-rich compost as a top dressing for lawns, a potting mix amendment, or a side dressing for vegetables. It improves soil structure, water retention, and provides a slow-release nutrient source.
Embracing a Sustainable Cycle
The integration of thoughtful tools, like certified compostable bags, represents a modern, hygienic approach to an ancient practice. It’s about working smarter, not just harder, to achieve a more sustainable lifestyle.
We invite your feedback: What specific challenges have you faced in your composting journey? Your questions help us shape future, in-depth content. Share your experiences in the comments below.
Interested in our compostable bags? Please fill out the form below to get a free sample delivered to you.